A sample text widget
Etiam pulvinar consectetur dolor sed malesuada. Ut convallis
euismod dolor nec pretium. Nunc ut tristique massa.
Nam sodales mi vitae dolor ullamcorper et vulputate enim accumsan.
Morbi orci magna, tincidunt vitae molestie nec, molestie at mi. Nulla nulla lorem,
suscipit in posuere in, interdum non magna.
|
The Aegean Sea gently laps the rocky shore a few feet from where we sit, its rhythm a soothing counterpoint to the searing heat of the midday sun. Along with a handful of other tourists, we’ve ducked under cover just in time. As anyone who’s been to southern Greece or the Levant knows, this is the time when the sun’s intensity bleaches all color from the strewn rocks and the hills beyond, and causes mere mortals to seek shade, a beer, and a simple table. It’s no wonder to us that most of the locals are napping.
 Days of tyropeta and Cretan champagne Crete had changed in the time we’d been away. The island that over thousands of years survived invasion by Mycenaeans and Romans and Turks was under siege by European tourists on package holidays. Ten years earlier, we’d poked through store-houses and royal bedrooms at Knossos and ogled paintings on the walls of the world’s first bathrooms; back then the palace was ours to roam. This time, the place was overrun by a thousand pushy Germans and Frenchman and red-faced lager louts, whose tour buses belched diesel fumes in the fresh parking lot nearby.
When we weren’t jostling for a spot on the beach, or standing in line for a table at one of the local restaurants, we were accosted on the streets of Malia by thumping bass that spilled from the clubs, and by Australian girls who thrust coupons into our hands for free drinks. To escape the hordes, we fell into a routine of noshing afternoon tyropeta in the little garden oasis we called our own. Over a glass of cheap Cretan champagne, we decided it was time to get away.
We found the old Crete we remembered on the northern shore at Chania. There, the waiter by the pool had the grace to blush as he told us we could expect little nightlife. The next morning we headed west, out onto barren stretches where the road gave way to cart tracks and herds of goats blocked the way. Near the northwestern edge, we sighed at the views across the sparkling Aegean, that stretched until forever.
That afternoon we came across a small town tucked into the bay where the sound of Greek fishermen calling out their catch was the loudest thing around. The modern world was a million lightyears away. There, two brothers who knew no English brought us some of the tastiest fish we’d ever eaten. Nothing fancy, but perfectly fresh and grilled with thyme and olive oil and salt.
When I make this fish at home, it takes me right back. To the sea, lapping at the rocks; to the rush of quiet stillness that assures me that the moment is enough. And in the chill of an overdue Seattle spring, I feel the warm Mediterranean sun kissing my shoulders. Over fish so fresh – so simply Greek – the stars realign.
Here’s my recipe.
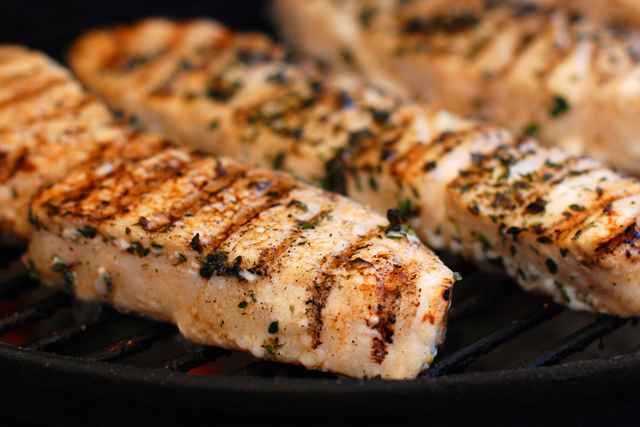
Greek Style Grilled Halibut
Serves 4
1 ½ pounds of fresh Pacific Halibut fillet
2 teaspoons of fresh thyme
1 teaspoon of dry thyme
2 Tablespoons of good olive oil
1 teaspoon of sea salt
Prepare the fish: Choose the freshest fish you can find. A fillet from the center about 5”x 9” and 1¼” thick is just right. Cut the fish lengthwise into 4 pieces, sprinkle with the thyme and sea salt and drizzle with olive oil. Cover with plastic and let marinate while you get the coals ready.
Heat the coals: This fish is best grilled over mature coals on a small charcoal grill. I use a Smokey Joe by Weber. With the vents half open, light 25 briquettes and let them burn until glowing hot, about 30 minutes. Spread the coals out and add another 10 briquettes. Put the grill in place and heat it for 5 minutes before scraping it clean. Brush the grill lightly with olive oil.
Grill the fish: Grill the fish for 4 minutes. Turn gently with large tongs, and grill for a further 5 minutes. In the last minute, sprinkle on any excess olive oil left in the marinating bowl. The fish will be done when it is white and flaky. Remove to a plate and serve immediately.
Now imagine the green Aegean Sea beyond the table and the sun turning the hills brown in the distance. A few red potatoes? Some Greek wine? Oh, yeah. It’s all good here! Kali Orexi!
 The Northwest Coast of Crete
I was trying to shut out the buzz at the table when I realized my dad was talking to me. Just to humor him I listened to his dumb old story about going to a deli about a hundred years ago. They probably had cool things like cars with big fins and transistor radios and space travel back then but he was talking about bread. My dad’s always talking about bread.
 With love to my son Kevin as he embarks on his 15th year. Before I knew it we were in the car headed out of the city. A fat woman with orange hair cut us off on the freeway so I gave her the evil eye while my dad cursed and honked the horn. Once I gave the evil eye to the lunch lady for giving me this miniscule piece of pepperoni pizza and she was out sick for the next three days. That fat woman is going to be sorry now for sure.
Anyway, we pulled up to the biggest, bluest store you ever did see, emblazoned in gigantic yellow letters ‘IKEA’ on the side. This is where Will Horowitz came to buy his crappy old bedroom furniture and he told me that people get lost here all the time, but when I grumbled about that my dad told me to put a sock in it and push the cart. It was one of those carts like they have in Italy on which all the wheels swivel, so you can push them sideways as easily as forward. I had fun with that, until I almost ran down this guy walking with a cane.
After walking for about a mile, we came to some shelves of food squeezed between the restaurant and the area where you can order a whole kitchen. My dad said he expected it was somebody with ‘Scandihoovian humor’ who arranged the store this way. I knew he meant to say ‘Scandinavian’ but instead of correcting him I pretended to be interested in some jars of pickled fish. Boy, the things they eat in those countries; it’s no wonder they give their kids names like Bjorn and Gunhilda.
On the way back my dad went on and on about ancient grains and fiber content and reindeer lichen, so I was pretty glad to be home again and slammed the door behind me. When the bell rang my dad was standing there red-faced on the porch. I don’t know what he was so upset about, but to show him I’m not a total stooge, I left him to make his bread by himself. I guess when you get to his age you need some time to yourself.
The bread turned out okay, I guess. Anyway, my dad wasn’t so grumpy anymore. If you’re old like him, you’ll probably want to see the recipe, so I’ll let him tell you all about it. Here it is:
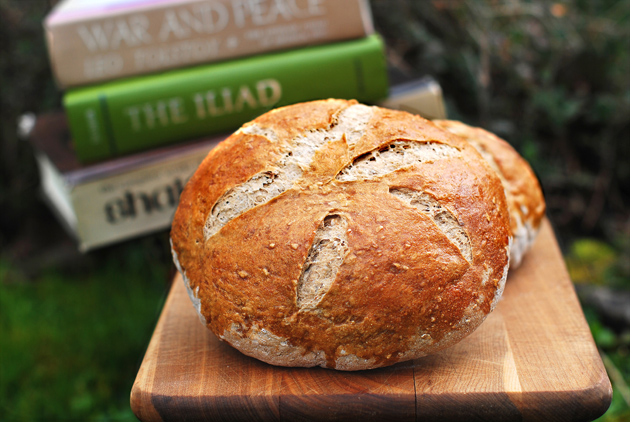
Catcher in the Rye Bread
Makes 3 loaves
Takes 8 hours
2.2 pounds Finax brand Lingonberry bread mix from Denmark, available at IKEA
10 ounces (2¼ cups) unbleached all-purpose flour
2 teaspoons of active dry yeast (about ¾ of one of the two packets attached to the mix)
26 ounces (3¼ cups) water at 100°
½ cup flour for bench work
1 egg + 1 teaspoon water for glaze
Make the dough and let hydrate: In a large mixing bowl, dry mix the packaged Lingonberry bread with 10 ounces of all-purpose flour. Make a well in the center of the mix, pour in a half-cup of the water and two teaspoons of the yeast that comes attached to the package, and mix together. (Unless you’re in a real hurry, it’s best to use this slow-rising method to allow the full flavor of the bread to develop.) Let sit for 10 minutes until the yeast begins to froth. Now add the rest of the water and, using the handle of a wooden spoon, mix to fully incorporate the flour and water, scraping down the sides of the bowl as necessary. Cover and let rest for 30 minutes before kneading.
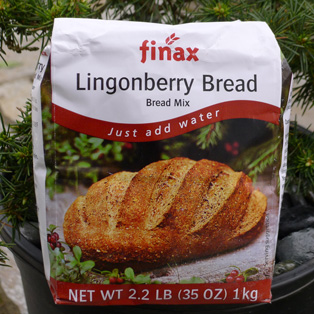 Premixed grains available at IKEA Kneading and first rise:
After a rest, lightly sprinkle a counter with flour and knead the dough for a minimum of 5 minutes, pushing and folding the dough until it’s soft and supple. Put dough back into a clean bowl, cover and let rise for 3 to 4 hours at room temperature or up to 6 hours in a cooler location.
Second rise: Deflate the dough on a lightly floured counter and fold it over several times, kneading lightly. Return to the bowl, cover and let rise at room temperature for another 2 hours.
For baking in a woodfired oven: Light a moderate fire in the center of your oven, gently warming up the stones in the first 1 to 1½ hours with a succession of small to medium-sized logs. After this time, put on two chunky logs (about 6” in diameter) and let them burn brightly. In the last hour, keep these going by adding some smaller support branches and move the fire side to side to heat the oven floor evenly.
Shape the loaves and third rise: Fit 3 round baskets with cloth napkins or dish towels, and sprinkle wheat or rye flour on them. Cut the dough into three pieces of 25 ounces each. Knead each piece lightly and shape into a ball; insert each ball face down into the baskets and draw the edges of the cloth over the dough to cover lightly. Let rise a further 45 minutes to an hour at room temperature.
Once risen, turn loaves over onto lightly floured paddles (or the backs of cookie sheets) and brush twice with egg wash. Slash lightly if desired to decorate.
To bake in a conventional oven: Fit quarry tiles or a pizza stone on the center rack of your oven and preheat for at least 30 minutes at 425°. Slide loaves directly onto the tiles or stone and bake for 15 minutes. Turn loaves around with a spatula, lower heat to 375°, and bake for 35 to 40 minutes longer until the loaves are medium brown in color. Remove to a rack to cool before eating.
To bake in a woodfired oven: Move the fire to the back of your oven and sweep the floor clean of ashes. Slip the loaves into a semi-circle about 12” from the coals and close the door. Turn 180° after 20 minutes, a quarter turn after another 20 minutes and all the way around for 10 more minutes. Loaves will be done when they are medium brown and the crust has taken on a lacquered sheen. Remove to a rack to cool.
In any case, let cool for at least 1 hour before digging in. These loaves keep well for up to three days in paper bags, but they’re so good they rarely last that long. Enjoy!
Edible Book Note: This bread will be available at the Good Shepherd Center in Wallingford as part of the Seattle Edible Book Festival. See their blog HERE for more info.

Eccles Cakes (really more of a pastry to us Americans) are savory treats filled with currants that are delicately spiced with nutmeg and allspice. Once you’ve had one, you’re hooked! The flavor combination is the quintessential accompaniment to tea for many an Englishman and Englishwoman. Sprung from the unlikely industrial town of Eccles, west of Manchester, in the late 1700’s, Eccles cakes are still a favorite today in England, as are their cousins from Banbury, to which my recipe is similar. And, in the old tradition, these are woodfired!
This post is part of the Foodbuzz benefit for ovarian cancer research. As part of the effort, we’ll be taking over the Top 9 on Friday, March 25th with tea party recipes. For more info and to donate to a great cause, please see http://www.kelly-confidential.com.
Disclaimer: Sortachef is in no way associated with the politically motivated Tea Party movement!
Woodfired Eccles Cakes 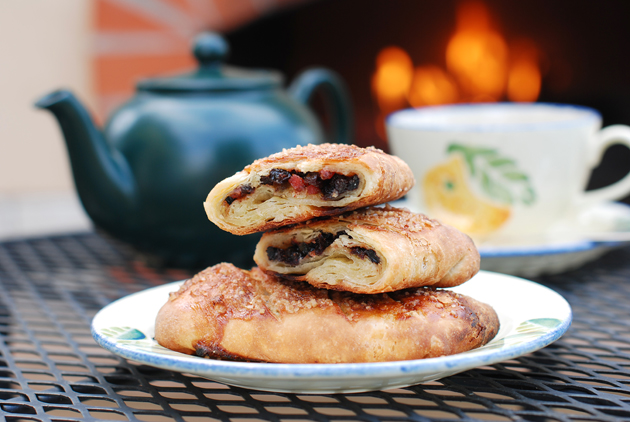
Makes 6 cakes
For the pastry:
2 cups flour
½ teaspoon salt
½ teaspoon yeast
2 Tablespoons sugar
4 Tablespoons cold butter, divided
7 Tablespoons cold water
2 Tablespoons Spectrum Shortening
For the filling:
2/3 cups currants
2 Tablespoons chopped peel
¼ teaspoon nutmeg
¼ teaspoon allspice
1 Tablespoon butter
1 Tablespoon sugar
Also needed:
1 eggwhite+1 teaspoon coarse sugar to coat
11”x17” parchment paper
Make the pastry: Combine flour, salt, yeast and sugar in a large bowl. Rub in 2 Tablespoons of butter and then lightly toss with the cold water. Make a compact mass, adding another tablespoon of water if necessary to make a stiff dough. Knead for 30 seconds, cover with plastic and refrigerate for 1 hour.
Using a rolling pin, spread the dough on a floured surface into a 10”x 15” rectangle. Dot 2/3 of the rectangle with 2 Tablespoons each butter and Spectrum shortening and fold in thirds to create layers. Roll out again and fold in thirds. Repeat, so that you have multiple layers of pastry with butter in between. Refrigerate for another hour.
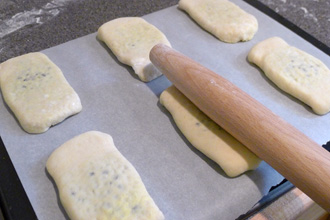 Flattening the cakes Heat and cool the filling: Combine filling ingredients in a small pan and heat over medium-low heat for 5 minutes. Let cool.
Make the cakes: Roll out the dough to 12”x 18”. Cut into 6 pieces, and put an equal portion of cooled filling on each. Fold like a burrito and tuck the ends over. Turn these pieces over, flap end down, onto the parchment placed on the back of a cookie sheet. Flatten with a rolling pin until you can see the currants beneath the surface. Let sit for 20 minutes before coating and baking.
Bake in a woodfired oven: Have your oven well heated, with the fire at the center. After 2 hours, push the fire to the back and sweep the floor clean of ashes. Coat the Eccles Cakes with eggwhite and slash with a knife to expose some of the filling. Sprinkle with sugar and pop into the oven to bake for about 10 minutes, turning once for even browning. Cool on a rack.
Bake in a conventional oven: Place quarry tiles on a center rack and preheat oven to 425°. Coat the Eccles Cakes with eggwhite and slash with a knife to expose some of the filling. Sprinkle with sugar and pop into the oven to bake for about 15 minutes, turning once for even browning. Cool on a rack.
Cup of tea then, Dear?
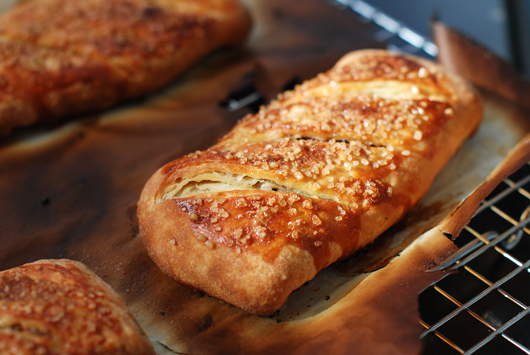 Eccles Cake on parchment
The guy in the light blue tee shirt darted around Paesano’s with the quick assurance of a fellow who had things to do. Slipping from behind the sandwich window he wiped his hands, pirouetted on the shiny tiles, landed at the edge of our table and raised his pad. He held his pen in the air. Then with a slight dramatic exhalation of breath he let his arms sink again.
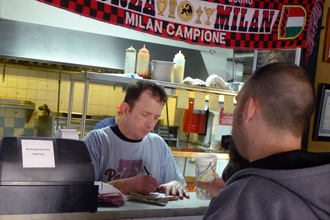 Taking sandwich orders at Paesano's This was not going to be so easy. He could see it in our eyes.
‘That? Well, it’s meatloaf fried crispy, made up like chicken parmesan.’ He pointed down the menu. ‘And that one, it’s house-made lamb sausage with sun-dried cherries. My favorite? – this week it’s a toss-up between the beef brisket with roasted tomatoes and the eggplant with braised fennel.’
Whoa. Hold on here a minute. Crispy fried meatloaf? Sun-dried cherries? Beef brisket, eggplant and fennel? Dare I even mention the suckling pig? Paesano’s certainly wasn’t your father’s sandwich joint. The guy went off to get drinks while we took it all in.
For a native son tracing the roots of his great Philadelphia sandwich childhood, it was new territory. There we were smack dab in the middle of Little Italy eating what could only be labeled cutting edge sandwiches. Furthermore, there were big burly guys waiting around the window for their cutting edge sandwiches, too. My sandwich senses tingled, but as I looked out on the sunlight slanting over the low brick rowhouses of South Philly and bit into one pretty awesome sandwich, I felt a keen sense of release.
Back in Seattle, my mind and my taste buds kept returning to Paesano’s. Even as the dough flowed under my hands in creating the perfect Italian hoagie roll as I remembered it from my youth (see Hogeland’s Homemade Hoagie Rolls for more on that), I imagined another roll, one just a bit more robust. Ready to take on tomorrow’s sandwich.
So here it is: a slightly savory roll that’s fairly easy to make at home and as a foundation can handle any great fistful of sandwich you can come up with. Go on, take it for a spin – and let your imagination run wild. I think the guys at Paesano’s would approve.
Now about that chicken and broccoli rabe sandwich? Nope, it’s not shi shi Seattle style. It’s pure Philadelphia, adapted from Paesano’s Diavolo sandwich; I’ve just cut down on the toppings. If you’re near South 9th Street at the north end of the Italian Market, do go and try the real thing.
And if you happen to see the guy in the light blue tee shirt, thank him again for me. He’s doing a great job. Cheers!
Sesame Seeded Sandwich Rolls
 Chicken, broccoli rabe and mature cheddar on a Sesame Seeded Sandwich Roll
Makes 8 rolls, 5 ounces each
For the rolls:
½ cup water at 100°
2¼ teaspoons instant dry yeast
15 ounces (3 cups) unbleached all-purpose flour + 5 ounces (1 cup) high gluten flour
-or-
10 ounces (2 cups) unbleached all-purpose flour + 10 ounces (2 cups) bread flour
4 teaspoons of sugar
2½ teaspoons of salt
1/8 teaspoon of ascorbic acid, or Fruit Fresh (optional)
1 cup water at 100°
1/3 cup milk, scalded and cooled
2 eggs
Additional flour for bench work
2 Tablespoons of sesame seeds
Recommended equipment:
2 pieces of parchment paper 11”x15”
6 quarry tiles or a large pizza stone (see note below)
For each sandwich:
¼ cup salad greens
3 ounces cooked chicken breast
4 sprigs steamed broccoli rabe
1 ounce of sliced mature cheddar
Prepare yeast and milk: In a small bowl, whisk together ½ cup warm water and a packet of instant yeast. Let stand for 5 minutes, until blooms of exploding yeast rise to the surface. Meanwhile, scald 1/3 cup of milk in a small pan by bringing it to a bare simmer over medium heat and then let cool.
Make the dough: In a large bread bowl, dry mix the flour, sugar, salt and Fruit Fresh. Make a well in the center and add the yeast mixture, 1 cup of warm water and the cooled milk. Mix it all together with the handle of a wooden spoon until the flour mixture and liquids are incorporated.
 Rolls nearly ready for their last rise Lightly flour a work surface. Using a dough scraper or spatula, lift the raw dough out of the bowl onto it and knead for just a minute to lump dough together. Invert the bowl over the dough on the counter and leave to rest for 20 minutes or a half hour. This will make kneading much easier.
Kneading and first rise: Knead the dough for 7-10 minutes until smooth and supple, adding small amounts of flour to keep it from sticking to the counter and your hands.
Clean and dry the bowl and put the dough back into it; cover and let rise for 2 hours or more at room temperature, until dough doubles in size.
Egg addition and second rise: Separate 1 egg, reserving one egg white in a small bowl to be used later. Add the egg yolk and 1 whole egg to the risen dough, mixing in ½ cup of flour to counter the stickiness (yes, it’s kinda sticky at first). Knead for a few minutes until the egg is well worked in. Clean and dry the bowl again if necessary. Put the dough back in and let it rise for a further 1½ hours at room temperature.
Shaping, coating and third rise: Divide the dough into 8 equal pieces. For accuracy, use a scale; each piece will weigh just over 5 ounces. On a lightly floured work surface, shape each roll into a 9” long snake. For best results, stretch rolls gradually over a 10-minute period in order to avoid tears in the skin.
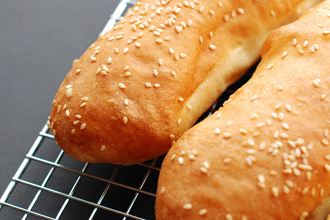 Sesame Seeded Rolls cooling on a rack Whisk the reserved extra egg white with 1 teaspoon cold water. Lay the parchment paper out on the backs of two cookie sheets. Put the dough snakes onto the parchment paper, 4 to a sheet and brush the tops twice with egg wash. Sprinkle with sesame seeds. Let rise in a warm humid place for 1 hour or more until doubled in size again.
Bake the rolls: In a conventional oven, fit quarry tiles or a pizza stone on the center rack and preheat oven to 425° for 30 minutes.
Slip risen rolls directly onto the quarry tiles or pizza stone on their parchment paper and, cooking 4 at a time, bake for 11 to 12 minutes until lightly browned on the top. Let cool for 30 minutes on a rack before diving in.
Repeat as necessary with the other rolls.
To make an awesome Chicken and Broccoli Rabe sandwich: Split a Sesame Seeded Sandwich Roll and layer with field greens, hot chicken breast, steamed broccoli rabe and mature cheddar. Happy noshing!
Quarry tile note: If you don’t have a pizza stone, don’t worry; the rolls will be fine, just a bit flatter. Sprinkle cornmeal or semolina onto 2 cookie sheets and put the dough snakes onto it for their last rise. Coat as directed above and bake in the oven on cookie sheets. Quarry tiles are available here in Seattle at Tile for Less.
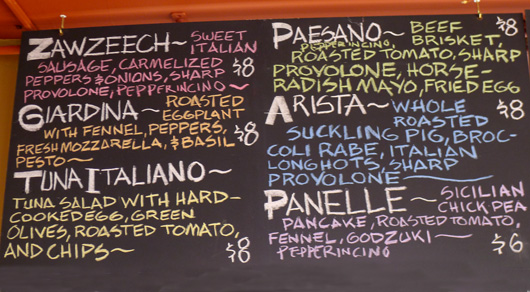 Just some of the sandwiches on offer at Paesano's in South Philly
I’ve never been to New Orleans, but my first Seattle roommate was a recent transplant who plunged me headfirst into its culture. With rabid enthusiasm he’d leap out of his chair, yank the needle off whatever album was playing at the time, and plop another record in its place.
‘You’ve never heard The Wild Tchoupitoulas?’ he’d cry. ‘Man that was the Neville Brothers at their best. It just wouldn’t be N’awlins without them!’ The room would swell with that Cajun rhythm, and before long we’d be dancing around the room. It was that good.
He also turned me on to Creole food. Jambalaya, gumbo, ‘Po’boy’ sandwiches and crawfish that were spiced to his demanding palate. And Red Beans and Rice, cooked long and slow to develop the flavor. Made with that trinity of Creole cooking: celery, green pepper and onion. Mm, Mmmm.
Of course, Chuck’s Red Beans would always have ham hocks in them; I’ve chosen to leave them out. Either way, these tasty beans are just what the doctor ordered. In fact, it wouldn’t be Mardi Gras without them!
Vegetarian Red Beans and rice
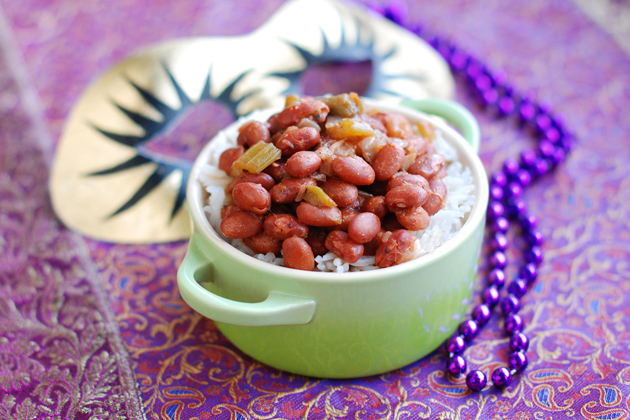
Enough for 6 hungry people
2 cups dry Small Red Beans, soaked overnight
2 medium yellow onions
4 sticks celery with leaves
1 green bell pepper
4 Tablespoons olive oil
6 cups water
2 teaspoons of salt
½ teaspoon of freshly ground black pepper
1 ½ teaspoons of dry thyme
1 ½ teaspoons of oregano
¾ teaspoon cayenne pepper
3 cloves garlic, pressed or finely chopped
8 ounces of tomato sauce
Cooked rice
Soak the beans: In a large pot, cover beans with enough cold water to submerge them by 2″. Cover the pot tightly and let the beans soak for 8 hours or overnight.
Make the trinity: Remove outer skin, trim ends and chop the onion. Rinse and chop the celery with its leaves. Remove seeds and stem and chop the green pepper.
Heat 4 Tablespoons of oil in a 12” skillet. Sauté the onion, celery and green pepper over medium-high heat for 5 minutes, turning occasionally with a spatula. Veggies are done when the pepper lightens in color and the onion is translucent. For best flavor, do not brown.
Put it all together in a pot: Drain the beans. In a large oven-proof casserole or dutch oven, put the beans and 6 cups of cold water and stir in the sautéed veggies. Now add the salt, black pepper, oregano, thyme, cayenne pepper and garlic.
Bake in a conventional oven: Preheat oven to 325°. Put beans on the center rack and bake for 2 ½ hours covered, stirring every half hour or so. After 2 ½ hours, add the tomato sauce and remove the lid from the bean pot. Cook for a further hour, until beans are tender.
Bake in a woodfired oven: This kind of cooking is great for the day after you’ve had your oven hot for pizza or bread, still warm with residual heat. Build a small fire to one side and, after about 45 minutes, put the beans on the other side. Add small to medium branches to keep the fire low and put the door in place to keep the flame down, leaving a 2” crack on one edge of the door as a vent. At this low heat, you can use an oven thermometer to check that your oven heat is as close to 325° as possible.
Bake for 2 ½ hours covered, stirring every half hour or so and turning the bean pot around each time. After 2 ½ hours, add the tomato sauce and remove the lid. Cook for a further hour, until beans are tender.
Time to celebrate: Make a pile of rice according to package directions. Put a scoop or two of rice in a bowl and top with Red Beans. Now get out your favorite Neville Brothers music and prepare to PARTY! It’s Mardi Gras after all!
Meatatarian note: For a meaty version of this dish, add 2 pounds of smoked ham hock to the pot and cut back on the olive oil. On the other hand, this vegetarian version makes a great side dish to Seattle Smoked Country Style Ribs, which I’ll be cookin’ up for Mardi Gras as well. It’s all good!
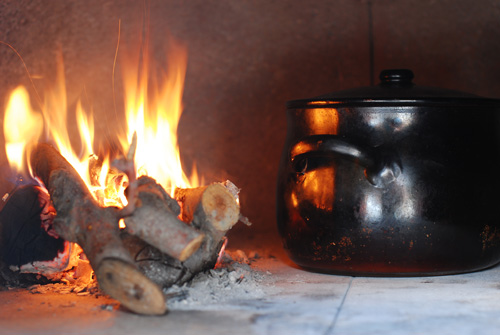 The bean pot in with the fire
This is about a tasty roll that was nearly lost to history.
Around a hundred years ago in Poland’s largest northern city, Bialy culture took over in a mad rush, flamed, and went out. You could buy one of these rolls – with their signature oniony middles – from any of a hundred places in the neighborhood. But by the end of World War II not a single resident of the Jewish quarter of Bialystok remained. The Bialy and its creators had been wiped from the planet.
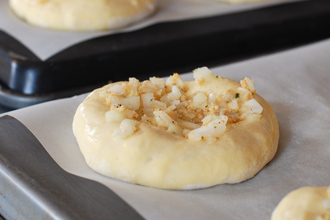 Bialystok Rolls nearly ready for baking Enough people remembered these little beauties to bring the Bialy back from the brink. Mimi Sheraton tells the story so well in her book The Bialy Eaters: The Story of a Bread and a Lost World that I recommend it to anyone.
A cross somewhere between a bagel and a tiny pizza, this roll has a flattened center which gets filled with onion that ‘cooks’ in salt for hours while the dough rises quietly elsewhere. A ‘Bialy’ as it’s known, when fresh from the traditional woodfired oven, has a mildly smoky flavor and a crust that billows around a kind of belly button of lightly caramelized onion at its center. The poppy seeds add a crunchy tang.
I think about the ghosts of Bialystok and their lost culture as I knead the dough, stretch it out, and mix the onion. There’s the girl with the deep dark eyes whose face lights up as the baker hands her a Bialy; she grabs the roll lovingly and skips away into the mist. The young couple courting over Bialys and tea who I can barely make out in the shadows behind a low window. And there’s always the old guys huddled in the square right near the white clock tower, who adjust their black hats against the cold. I imagine those old dudes rubbing their hands together in some Ashkenazim gesture and musing over my antics; their breath fogs the air. And as I take the rolls carefully from the oven, with the sweet smell of onion rising in the heat, one of them makes a quarter turn and assesses my rolls with his sharp eyes.
‘Not bad for a Goyem baker,’ I hear him say, turning back to the others and chuckling. ‘Not bad at all.’
Bialystok Rolls crusted with Salted Onion and Poppy Seeds
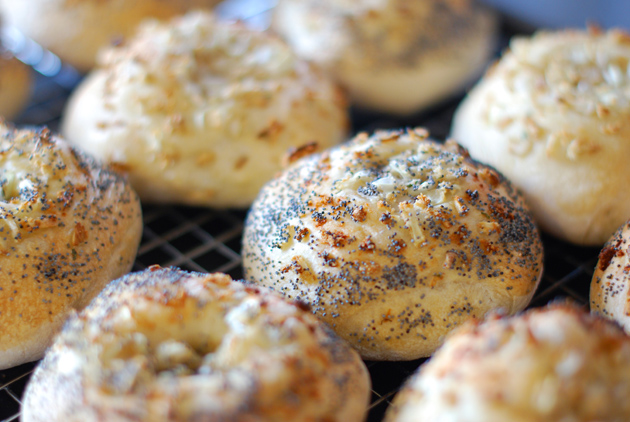
Makes 12 Bialys
For the dough:
2 cups water at 100°
1¼ teaspoon dry yeast (double for faster option, below)
4 cups or 20 ounces of unbleached bread flour (11.5% protein content)
1 ½ teaspoons of sea salt
2 Tablespoons canola oil
1 cup of flour for bench work
For the topping:
6 ounces of finely chopped sweet onion
1 teaspoon of sea salt
2 Tablespoons of herbed bread crumbs
1 eggwhite+1 teaspoon of cold water
2 Tablespoons of poppy seeds
Faster option: As with many small breads, these rolls are meant to rise and bake quickly after the dough goes through a long slumber, which for me means overnight. You can double the quantity of yeast and let the dough rise at room temperature for 3-4 hours if you like, with some subtle changes in flavor and texture.
Make the dough: Add yeast and ½ cup water to a large mixing bowl. Stir vigorously and let sit for 10 minutes to let the yeast hydrate. Mix in the flour and the other 1 ½ cups of water and leave for 30 minutes before kneading.
Add salt and canola oil and knead for 5 minutes to make a soft dough.
First rise: Put dough into a clean bowl which is at least 3 times the volume of the dough. Cover and let sit in a cool place for 8 hours or overnight (55-60° is optimal).
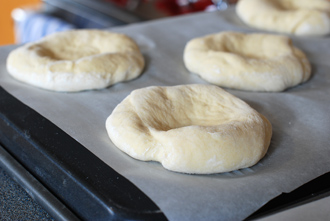 Bialy blanks proofed and ready to fill Make the onion topping: Finely chop the sweet onion, and mix it with a teaspoon of salt. Cover with plastic wrap and let sit for at least 4 hours or overnight. The salt in the mix will ‘cook’ the onion so that it exudes moisture and matures in flavor. Drain the exuded liquid and mix the onion with breadcrumbs just before topping.
Second rise: Punch down dough, knead and fold it for a minute on a floured surface and return it to the bowl. This time, let rise at room temperature (68-70°) for 2 or 3 hours until doubled in bulk.
Heat the woodfired oven: Your fire should be 2 hours old with enough moderate heat to sustain the oven for an hour’s baking. Every 20 minutes for the last hour, move your fire side to side to evenly heat the floor tiles. A few minutes before putting in the rolls, push the mature coals to the back center of the oven and brush the floor clean of ashes. There should be little or no flame when the Bialys go in.
Heat a conventional oven: Line a center rack with a pizza stone or quarry tiles. At least 30 minutes before baking the first rolls, preheat the oven to 425°. You will need to stagger the next steps to have half the Bialys ready 20 minutes after the first lot.
Form the Bialys: Turn the dough out onto a work surface, and form it into a snake. Cut the dough into 12 equal pieces of about 3½ ounces each. Tuck the sides of each ball under and stretch the tops into mounds. Flatten each piece with your palm and let rest on the counter for 10 minutes before proceeding. Meanwhile, cut 2 pieces of parchment paper to fit the backs of two cookie sheets.
After a rest, stretch each piece of dough out like a 5” pizza, making a thick rim with a depression in the center. Put 6 of these onto each piece of parchment paper. Cover loosely with a cloth and let sit for 30 minutes before topping.
Top the Bialys: Mix eggwhite and water. Mix drained onion and breadcrumbs. Brush the top of each roll twice with eggwhite wash and then scoop a teaspoon of the onion mixture into the middle depression, smearing it up onto the sides as desired. Finish each Bialy with ½ teaspoon of poppy seeds.
Bake in a woodfired oven: If the floor of the oven is well heated and swept clean with the fire pushed all the way back, you can easily bake a dozen Bialys at a time in your oven. Put half to either side, let bake for 5 or 6 minutes until puffy, and carefully turn the parchment sheets around. After turning, my parchment sheets always want to slip out with the peel, but as long as the rolls have been turned it doesn’t matter. Let bake a further 5-7 minutes until the tops begin to brown.
Bake in a conventional oven: Bake the rolls (six at a time) on the parchment paper directly on the quarry tiles for 8 minutes at 425º, turn carefully around and bake for a further 7 or 8 minutes, until the onions begin to brown.
Pull the Bialys from the oven with a metal peel or spatula and let cool on a wire rack for 30 minutes to an hour. That is, if you can wait that long. And I can guarantee that if you share some of these great rolls with any of your neighbors who grew up in the Bronx or Brooklyn, you’ll have friends for life. L’chaim!
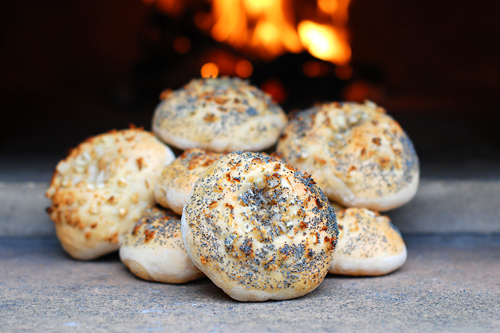 Bialystok Rolls fresh from the fire.
Southeast of Grenoble the D1091 climbs quickly into the forest of Rioupéroux, on the western slopes of the French Alps. Called alternately the Route de l’Oisans or the Route des Alpes, the road is a notorious feature of the Tour du France and – as any avid cyclist will tell you – a real bugger to ride. As we navigate the switchbacks in our rental car, grey stone towns give way to vast green meadows that sweep the sun-drenched slopes.
 Piste Pastorale in the Alps near Besse, France Up there, the air through our open windows smelled of cut grass and damp earth and alpine flowers, while towering clouds punctuated the deep blue skies and lent coolness to the waves of heat. The kids got restless while we muddled over that perfect picnic spot, so we crammed them with crusty baguette sandwiches from the back of the cars in a hurried bit of frenzy. A little later and a lot more calmly, we found a place off the side of a side road, with a creek for the kids to explore and a trail that led adventurously into the high slopes nearby.
This is what always amazes me in Europe: you go hightailing off into what seems like the wilderness and there, on the edge of the world, is a tiny outpost that’s been there for hundreds of years. As my nephew and I climbed up into a scrub of trees, we peered at this cluster of stone houses. Almost to the crags of the highest peaks they were, set down like part of the mountain itself, huddled tightly together. Around them was greenery, but with only a few gnarled trees. As far as we could tell, they were about as exposed on that mountain as any dwellings could get.
Back down into relative civilization, we stretched our legs in the picturesque village of Besse (population 139). At the far edge of town, we bought bread from La Boulangerie la Tourte de Besse, where the baker tended his woodfired ovens in a small stone chalet. Around us, as far as the eye could see, were alpine vistas that stretched to the sky. It was all breathtakingly beautiful.
Later, as the kids splashed in the pool, we sat around the table and took in the night. That bread, with its smoky crust, delicately chewy insides and sweet tang of grains – older than the oven it came from – was good for the soul. In its flavors I tasted long snowy winters and hard living mingled with the freshness of green meadows and crisp alpine air. Here in Seattle, I break it out occasionally to take me back.
Here’s my recipe for connecting with the ancients.
Old World Alpine Loaves
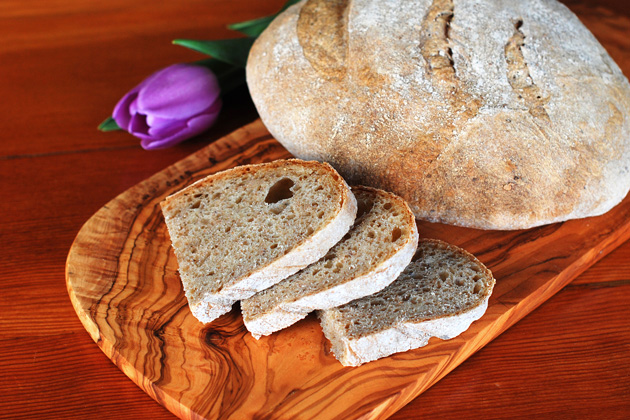
Makes three loaves
Takes 24 hours
For the starter:
8 ounces water
10 ounces (2 cups) all-purpose flour
1¼ teaspoons dry yeast
For the bread:
The fully proofed starter
9 ounces (2 cups) spelt flour
4 ounces (1 cup) rye flour
2 Tablespoons ground flax seed
18 ounces (3 ¾ cups) all-purpose flour
3 teaspoons of salt
24 ounces (3 cups) of water at 100°
1 cup of flour for bench work
Make the starter: In a large bread bowl, mix 10 ounces flour, 8 ounces warm water and 1¼ teaspoon active dry yeast together. Cover and set at room temperature for 12 hours, until it is frothy with bubbles. Stir down before using.
Make the dough: Using kitchen scissors or a sharp knife, cut the starter into 10 pieces and douse with a cup of water to separate the pieces. Add spelt flour, rye flour, flax seed, 3¾ cups of the all-purpose flour and salt. Pour on the other 2 cups of water and mix with the handle of a wooden spoon until sticky. Cover and let sit for 30 minutes before kneading.
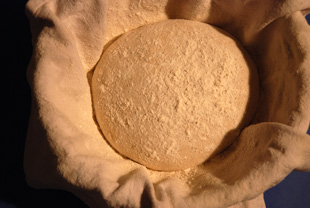 Proofing a loaf in a basket Kneading and first rise: Turn out onto a well-floured work surface and knead for 10 minutes, until the dough is soft and relatively smooth. Add more flour as necessary. Clean and dry the bowl and return the dough to it. Cover and let rise for 5-6 hours in a cool place (60° if possible).
Second rise: Move dough to a room temperature environment (68°). Punch down, and let rise for a further 3-4 hours.
Prepare your woodfired oven: Build a moderate fire and maintain it for 2 hours, until some of the carbon on the inside walls has turned white. Move the fire around in the last hour to heat the floor where your loaves will be. In the last 20 minutes, move the fire to the back and sweep the floor well. By the time your bread goes in, you should have a good bed of coals and very little active flame.
Prepare your conventional oven: Line an oven rack with quarry tiles or a pizza stone and set it at the middle height of your oven. Preheat your oven to 425° for at least 30 minutes before putting in the bread.
Shape the loaves: Turn the dough out onto a floured surface and cut into three equal pieces. Flatten gently to push out most of the large bubbles and fold the corners over to stretch the skin that will be the top of each loaf. Turn over each piece and tuck the bottoms under to make a ball. Flour 3 cloth napkins fitted into baskets, put a ball of dough on each, cover with the corners of the napkins and let rise for 1½ hours in a warm place.
When ready to bake, put loaves onto a lightly floured peel or the back of a cookie sheet and slash a design into the top, if desired.
Baking in a woodfired oven: Slip the loaves into the oven about 12” from the coals in a semi-circle. Turn the loaves around after 20 minutes; ¼ turn after another 20 minutes; and all the way around again after another 10 minutes. Loaves will be done after 1 hour altogether.
Baking in a conventional oven: Slip loaves two at a time onto the quarry tiles (you will need to hold one loaf for later or reduce the recipe accordingly to make 2 loaves). Bake at 425° for 15 minutes. Lower temperature to 350° and bake for another 40 minutes, turning the loaves around once. Loaves will be baked in 55 minutes.
Cool on racks for 1 hour before digging in. With some good hearty soup and a hunk of sharp cheese, you’ll have a meal worthy of the ancients. The roaring fire is up to you…. Enjoy!
 Besse, in the Alps above Grenoble in France
One sweet side effect of Seattle’s indistinct seasons is that there’s never a wrong time to barbecue. An old-timer brought it home to me some years ago:
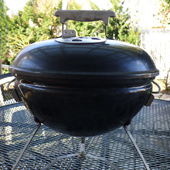 Smokey Joe portable kettle barbecue ‘You’re doing what?’ I asked incredulously.
‘I’m gonna barbecue me up some re-ibs’. His accent was fake but the big package of country style ribs was real enough.
‘But it’s February!’ I cried, peering out at a mist-hung landscape where every inch of surface was damp and dripping.
‘Hey, it’s hardly raining and the thermometer says high forties,’ he said. ‘Like a good day some Junes around here.’ He threw coals onto the grill and went clattering through the cupboards in search of his big pot.
I watched fascinated as he first boiled the meat and then grilled it, tossing on some maple branches and clamping down the lid to let the ribs smoke. Finally, he popped them into the oven after smothering them with what he called ‘finishing sauce’, and let them slow cook for hours.
The other day I whipped up a batch of Seattle style ribs for my son the meatatarian. While gargantuan football players vied for the coveted title, those ribs baked slowly, until their sweet flavor filled the whole house. After the game, we dug in.
And were those ribs good? Mmm. They were rich and moist and smoky – with a flavor bright enough to shake the moss off your north side.
Or in other words, as that old timer used to say: ‘Heck yeah!’
Seattle Smoked Country Style Ribs 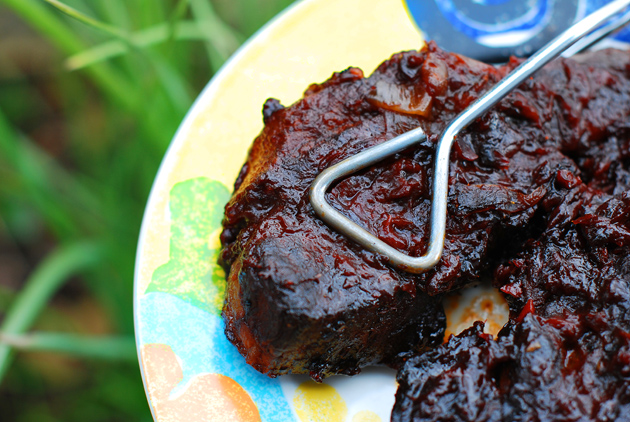
Enough for 4-6 hungry people
5 pounds of bone-in country style ribs
1½ quarts of water
½ cup of cider vinegar
Black pepper
1 medium-sized onion
3 cups of barbecue sauce (see one option below)
8 finger-thick apple branches 1-foot long, to smoke the ribs
Boil the ribs: Bring 1½ cups water + ½ cup of vinegar to a boil in a large pot. Put half of the ribs into the water; bring it back to a boil and, once boiling cook for 4 or 5 minutes. Do the other half the same way, scooping off any scum that rises to the surface of the pot. Sprinkle the ribs generously with black pepper and set aside. Discard all but 2 cups of the boiling water.
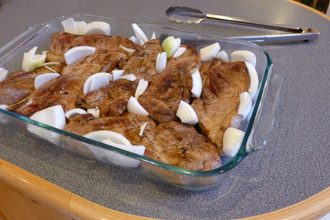 Studded with onions and nearly ready to bake Grill and smoke the ribs: Light about 40 charcoal briquettes in a small grill (mine is a Smokey Joe by Weber) and let burn for a half hour. Spread out the coals, put the grilling surface in place and squeeze on all the ribs at once. After 7 minutes, lift the grill and place the apple branches directly onto the coals. Now turn the ribs, wait a minute and, once the smoke is billowing around the meat, clap the lid down. Adjust all vents to be ¼” open and let smoke for 20 minutes.
Bake the ribs: Cut an onion into 8 pieces. Spread the smoked ribs one layer deep in an 11×15 glass lasagna pan and pour 1 cup of the reserved rib water over them. Stick onion pieces into the cracks between the ribs. Spoon 1 cup of barbecue sauce over the ribs (see easy recipe below or use your favorite) and pop them into a 300° oven.
Turn the ribs every hour, spooning on more barbecue sauce with each turn. The ribs will be tender in 3 hours. If you want to leave them in the oven even longer, turn the temperature down to 275° after the first hour and bake for 4 to 5 hours altogether. Add more water in the second half of baking if necessary, but otherwise these ribs require very little attention while in the oven.
Easy barbecue sauce (okay, finishing sauce, if you prefer!): In a saucepan mix 1¼ cups ketchup, ¼ cup vinegar, 3/4 cup water, ¼ cup sugar, 1 ounce of Worcestershire Sauce, ½ teaspoon of garlic powder and 4 tablespoons of either ancho chile powder or American chili powder. Cook over medium heat for 10 minutes, stirring well until hot and smooth. Simmer longer if desired in order to develop the flavors. For an extra kick, add ½ teaspoon of cayenne.
Slather onto Seattle Smoked Country Style Ribs and enjoy that old time taste!
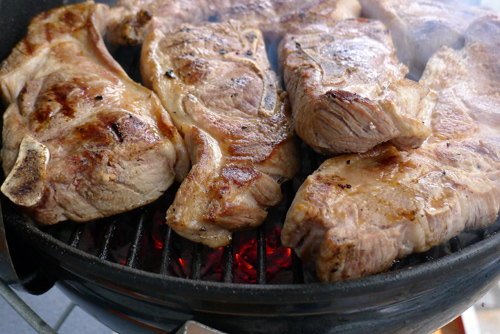 Ribs on the grill just beginning to smoke!
The rain cleaned the cobbles in the night, giving way to a fresh mist which hung lightly over the slow-moving Tiber. A man with the only gas-powered leaf blower we’d ever seen in Italy blew damp leaves down the stairway beside the Ponte Mazzini, rousing the sleeping gypsies who live under the bridge. As we waited for our bus under thinning trees along the boulevard, we noticed that everyone around us had on sweaters and jackets and bell-bottoms. That same coolness which to a Seattleite was refreshing had made the Romans bundle up tightly overnight.
 Porta Portese Sunday Market in Rome The mercata della pulci in the Porta Portese at the south end of the Trastavere was already humming with life by the time we arrived. The wide thoroughfare on which cars generally flew hell-bent to the airport had been transformed into a miles-long flea market winding through the neighborhood. Hundreds of stalls now lined every side street between the river and the old city wall, offering new and used clothing, fossils, gadgets, kitchenwares, electronics, furniture, jewelry and knickknacks as far as the eye could see. Locals swear you can buy anything here on a Sunday morning, as long as you have the time to search and the wherewithal to haggle. Eyes wide, we had to agree.
At one corner, an enormous hill of shoes was under attack, old ladies jabbering excitedly as they threw elbows at one another. A small dark teenager in a leather jacket watched the women moodily as he threw plastic-wrapped dress shirts onto a U-shaped table nearby. A bit farther along, I made the mistake of lingering too long over a little toolkit with tiny pliers and, before I realized what was happening, the vendor had put the toolkit in a bag and was shoving it at me. I put up my hands, ignoring his shouts as we walked quickly away.
And then, just as the sun peeped from behind a cloud, hunger overtook us.
Out on the main drag, we came upon a row of food stalls, bursting with salame, cheeses, prosciutto, little pastries and hunks of pizza. From a cheerful truck vendor, we chose sandwiches – Roman style sandwiches – which were, as with everything Italian, based on quality, not quantity. The man popped sandwiches into our hands and smiled as we handed over coins.
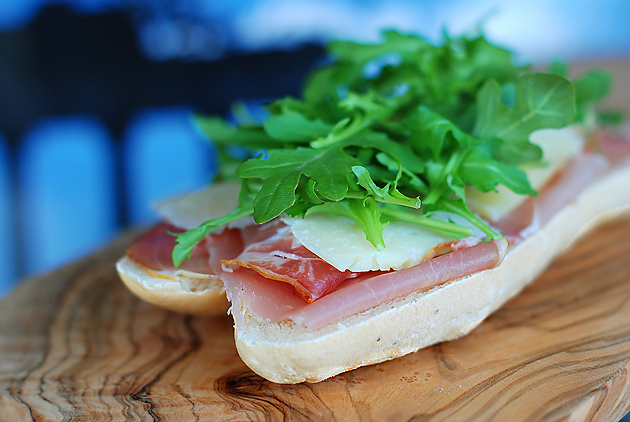
And were those sandwiches good? Oh, yeah. A few slices of heavenly prosciutto, slices of salty pecorino (what in our family we call ‘Emiliano cheese’), a bit of arugula and a drizzle of olive oil. All this on top of a sliced roll that was so fresh I could only imagine the family had been up in the night tending the fire.
So what’s not to love? We had it all there: the shoulders of ten thousand Roman compadres to rub, a neighborhood more than a thousand years old to explore, and everything under the sun to peruse. We bit in and watched the whole world turn.
Here’s my take on those oh-so-honest rolls.
Roman Style Sandwich Rolls
Makes 1 dozen rolls
12 ounces Biga or day-old dough (see note below)
½ cup water at 100°
2 ½ teaspoons of dry yeast
2 cups of unbleached all-purpose flour
2 cups of bread flour
1½ teaspoons of salt
1 cup of water at 100°
1/3 cup of milk, scalded and cooled
1 cup of flour for bench work
Semolina or cornmeal for finishing
Note: For authentic flavor and texture, Italian bread is made with a piece of day-old dough which is often called ‘La Nonna’ or the Grandma. You can use any dough left over from making bread or pizza, as long as it hasn’t dried out. Alternatively you can make a Biga by combining 1¼ cups of flour, 5/8 cups water and ½ teaspoon of dry yeast, and letting it bubble overnight. Either way, you’re tapping into a very old baking tradition.
Make the yeast mix: Put the Biga or 12 ounces of day-old dough cut into pieces into a large mixing bowl, pour on ½ cup of warm water and top with the dry yeast. Let sit for 15 minutes, agitating once or twice, until the mixture is frothy.
Make the dough: Add the two flours, and dry mix with the salt. Make a well in the middle and pour in the water, a bit at a time, gathering in some of the flour, and then finally add in the milk. Using the handle of a wooden spoon, gather the whole mass together, scraping down the sides of the bowl as necessary.
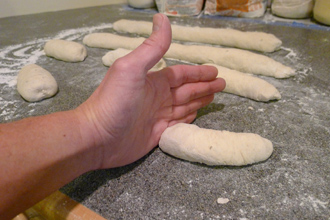 Cutting the rolls Sprinkle ½ cup of flour onto a counter. Using a dough scraper, clean the mass of dough from the bowl and plop it onto the flour. Fold the dough onto itself, turn it over and cover with the bowl. Let rest for 20 minutes to a half hour to fully hydrate before continuing.
After a rest, knead for 10 minutes, using extra flour as necessary to keep it from sticking to the counter. Your hands will get a bit sticky in this process, but please don’t overdo it on the additional flour. Your end goal is a smooth and elastic dough ball, the foundation for good bread. Toward that end, clean off your hands under the tap, dry them well and persevere!
First rise: Put the dough ball back into a clean mixing bowl, cover with a damp cloth or plastic, and let rise at room temperature until doubled in bulk, about 2 hours.
Second rise: Deflate the dough, knead on the counter for a minute or so, and return to the bowl for another 1½ to 2 hours.
Shape and wet the rolls: After the second rise, shape the dough into a snake, tucking in the skin to form the gluten cloak. Continue forming an elongated stretch of dough, letting it rest as need be to achieve a long tube of dough with a taut skin. Break this into 2 strands, and then 4 pieces; after a few minutes rest, break each of those strands in thirds to make 12 pieces, using the edge of your hand like a saw to make each cut.
Put the pieces onto 2 lightly floured cookie sheets and, after 10 or 15 minutes, make each piece longer and thinner.
Sprinkle the sheets with semolina and arrange the rolls on them. Wet the tops of the rolls with a little water and finish with a little semolina or cornmeal. Let these rise for an hour at room temperature or until doubled in size.
Move the risen rolls onto a wooden peel or a flat cookie sheet and let rise for a final 10 minutes.
Bake in a conventional oven: Line the center rack of your oven with quarry tiles or put down a pizza stone and preheat to 425° for 30 minutes. Slip rolls directly onto the ceramic surface and bake for 8 or 9 minutes, turning end-to-end once. Because of the low salt content of these rolls, they will still be light brown when fully baked.
Bake in a woodfired oven: Your fire should be two hours old with a moderate bed of coals. The oven should be at medium heat, with a fair amount of black ash still on the walls. For best results, move the fire around in the last hour to make sure the floor is evenly heated. When the rolls are nearly ready to bake, push the coals to the back, toss on 2 or 3 small sticks to keep the fire active but low and brush the floor well. Slip rolls onto the floor, ends toward the coals and bake for 8 or 9 minutes, turning end-to-end once. Because of the low salt content of these rolls, they will still be light brown when fully baked.
Cool for 30 minutes or more before filling with prosciutto, pecorino cheese and arugula. Top with a little good olive oil, and imagine the market of old Rome swirling around you as you bite into a bit of culinary heaven. Buon Gusto!
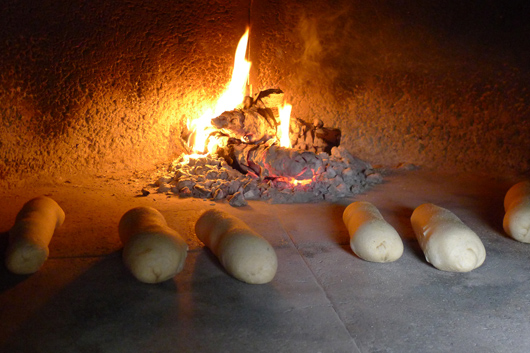 Roman Style Sandwich Rolls in the fire
It’s strange to hear Eros Ramazzotti sing his songs in Spanish. Oh, sure, the quintessential Italian rock star still has that big round voice with its soaring crescendos and the quirky clipped lyrics. But somehow – in the Spanish version – his passion is tempered. Well there you go: I guess not all things Italian translate well.
When it comes to a great seafood dish like Shrimp Fettuccine, however, you’re talking a whole different kettle of fish. You can push and pull at the flavors, tweak the vegetables and translate it all you like.
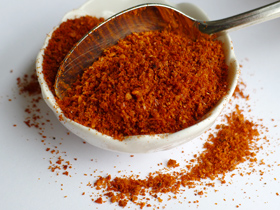 Aleppo from Syria: Bright and sweet with a touch of salt In fact, this dish and its flavors are happy to go international and then some. With the soaring flavor of Aleppo pepper from Syria, the big round taste of Louisiana Shrimp and the quintessential background of Italian-inspired Fettuccine, the passion is all there and more. And did I tell you – it’s easy?
In fact, Aleppo Shrimp Fettuccine is a perfect dinner to end a work day. As long as you plan ahead and work backwards from the time the noodles are done, you can have it all together and on the table in 35 or 40 minutes. And if you’re intimidated by the bold flavor of Aleppo, which is sweet and moderately spicy at the same time (think sun-dried tomatoes meet ancho chili), you can always substitute a blend of Hungarian Paprika and Mexican Pasillo chili.
Now just to make it a bit more international, I’m going to put on my favorite music to cook a big bold meal to. Eros Ramazzotti’s Calma Apparente. But just to be safe, I’ll stick with the Italian version. Some things are better in the original, after all!
P.S. – One word of caution. My whole family agrees that Parmesan Cheese overwhelms the flavors of this dish. Leave it out.
Aleppo Shrimp Fettuccine

Make 4-6 servings
1 pound medium to large cooked cocktail shrimp
½ teaspoon sea salt
2 Tablespoons Aleppo pepper, available at spice shops
2 large carrots
1 bunch (8 pieces) green onions
2 cloves garlic
2 ounces good olive oil
1 ½ cups vegetable stock
1 pound dry fettuccine noodles
Prepare veggies and shrimp: Remove tail shell from the shrimp, put the meat on a plate and sprinkle with salt and Aleppo. Wash veggies. Trim the roots and top 4 inches of green from the green onion. Top and tail the carrots, and scrub well. Cut carrots into medium dice and chop the green onion, keeping the green and white bits separate. Remove skin from 2 large cloves of garlic.
Bring water to a boil: Heat water in a large pot for noodles. Check package for cooking time (mine said 11-12 minutes).
20 minutes before noodles are cooked: Heat a 10” frying pan over medium heat. Coat with 1 Tablespoon olive oil and cook ½ of the shrimp at a time for 1 minute per side. Chop garlic and add one clove to each batch in the last minute of frying. Set cooked shrimp back on plate.
12 to 15 minutes before serving: Add noodles to the boiling pot and cook according to directions. When cooked ‘al dente’, strain, coat with a small amount of oil and set aside.
12 minutes before serving: Add remainder of oil to the frying pan and sauté carrots with the white bit of the onion over medium-low heat for 5 minutes. Turn to low if cooking too fast. Meanwhile, either have stock ready or make it with stock base and hot water.
6 minutes before serving: Stir half the shrimp in with the veggies, fry for a minute to bring the meat back to temperature and add the stock. Simmer for 3 minutes. Put the other half of the shrimp on top of the veggies and continue cooking for two more minutes. For presentation’s sake, these shrimp will heat without shedding their Aleppo.
Assemble the plates: Put ¼ of the noodles into each of 4 pasta bowls and gently put veggies and shrimp over the noodles. Spoon broth around the edges for best presentation.
Bring to the table steaming hot.
Serve with large hunks of crusty bread – preferably homemade. This is an international dish after all!
For a similar dish that’s maybe a tad less elegant, see Camping Clam Spaghetti in the Redwoods. Chipmunks available at no extra charge!
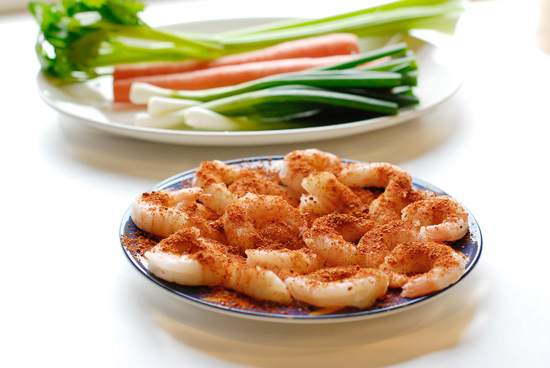 Aleppo Shrimp Fettuccine ingredients prepped and waiting in the wings
|
A sample text widget
Etiam pulvinar consectetur dolor sed malesuada. Ut convallis
euismod dolor nec pretium. Nunc ut tristique massa.
Nam sodales mi vitae dolor ullamcorper et vulputate enim accumsan.
Morbi orci magna, tincidunt vitae molestie nec, molestie at mi. Nulla nulla lorem,
suscipit in posuere in, interdum non magna.
|
|


