
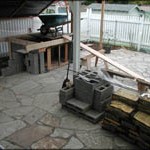
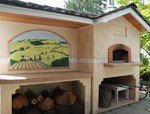
This oven gets constant use here at Chez Bullhog.
I built this oven from the ground up. With planning, it took about 8 months start to finish. At its heart is a Valoriani unit imported from Italy by Mugnaini of California. Their website and representatives have more information than I could ever give you. I’ll let the photos speak for me, but know this: it is one of my most satisfying accomplishments. It has become a focal point for our entertainment and has changed my cooking and baking forever. If you intend to build one, I’d be happy to give you what advice I can, and good luck!
Please see text below the photo gallery for a description of the process.
-
- Location,location,location
-
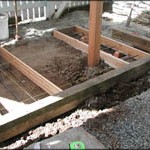
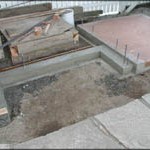
- First pour
-
- Completed foundation
-
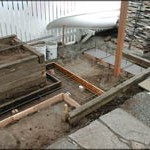
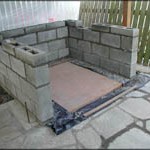
- Oven base ready for pour
-
- Foundation and oven floor complete
-
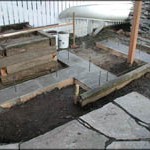
- Mocking up the walls
-
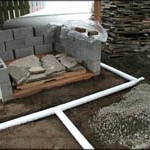
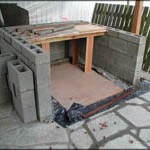
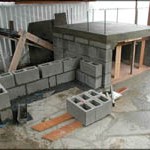
- Don’t forget the drainage
-
- Starting the walls
-
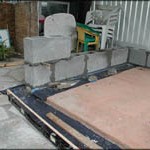
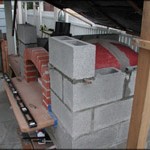
- Lower oven support walls
-
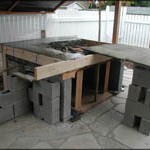
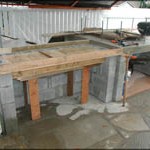
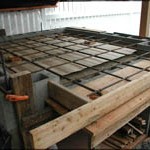
- Building the form
-
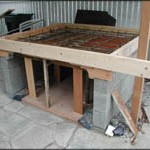
- Ready to rock and roll
-
- Testing the ramp
-
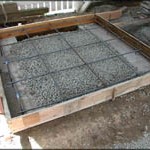
- Pouring the big one
-

- 18-sack pour completed
-
- Main oven slab curing
-
- Building the side counter mould
-

- Colored concrete work
-
- Working the cream
-
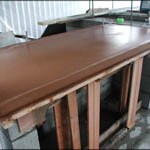
- Finished side counter
-
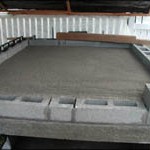
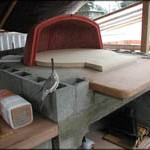
- Sand base
-
- Ready for last pour
-
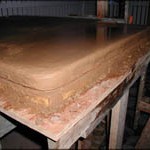
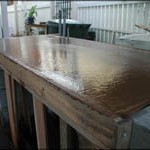
- Finished oven counter
-
- Laying out the ‘igloo’
-
- The ‘igloo’ finished
-
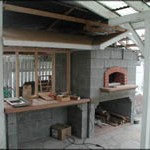
- Upper walls growing
-
- Roof structure
-
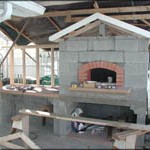
- Roof framed and sheathed
-
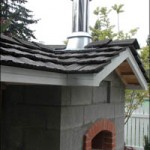
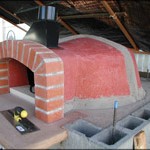
- Finished roof and chimney assembly
-
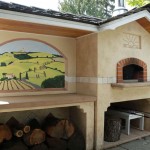
- This oven gets constant use here at Chez Bullhog.
Placement of the oven had to meet several criteria: accessibility, safety, neighborliness and overall functionality with the patio. Once we decided on a location, we talked to the neighbors who might be affected by its smoke. With their blessing, I moved ahead with the design. Mugnaini supplied a detailed plan for the base which supports the oven, and options for two types of roof structure. I added the side counter and figured out how it would fit with the oven. Then I got to work.
The patio I had built over the summer (about 1000 square feet of outdoor entertainment space) was near enough to completion that I could locate the height of the oven, which to me was as important as its location. I laid out string lines and dug down to hardpan, built my forms and started mixing concrete. I’d already faced the fact that, as there were so many pours involved, I’d be mixing by hand. Hey, it was good honest work!
I don’t know if one of those photos is out of order, but I do know that at the last minute I decided I’d kick myself if I didn’t add drainage around the base of the oven. Some retrofitting was involved.
Working with concrete block was frustrating at first. No matter how I put on the mortar, wet the blocks down or used a latex additive, I ended up with more mortar on the ground than on the blocks. I decided I was being too perfect. Lay a bed of mortar, put some on one side of each block, bang it home and go back to fill the cracks later. One trick I discovered was using half-inch sticks of wood temporarily between layers to support every third block. This way my whole row didn’t sag. After every row, I checked carefully for straightness and alignment.
After every three rows, I let the mortar cure for a day. Before doing the counter moulds, I let the mortar cure for three days. In this time, I also filled some of the voids in the block with concrete, including the corners, and stuck in some rebar to pin the counters to the lower walls.
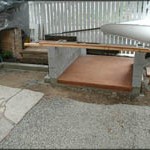
The floor of a pizza oven (about 42” off the ground) rests on a slab of concrete that floats on 6 inches of sand, all of which sits on a hidden slab of concrete that weighs nearly a ton. To pour this monster, I built a temporary platform, a form and a ramp to get the wheelbarrow up to counter level. It was one of the hardest days of the project, and the only time I wondered if involving a concrete truck might have made sense.
By this time, I was feeling pretty confident about concrete, but to date, I’d only done one pour where the finish would be seen (the floor of the base). I got some 2” high boxes, about a foot square, and poured some concrete into them to practice working the ‘cream’, which is the layer on the top of concrete that shows forever. Too much cream is weak, not enough is rough, and getting the right amount takes practice. By the time I was ready to pour the side counter, I’d practiced on 3 or 4 of those box pours.
Now it was really getting exciting. I built the form for the side counter so that it would have some detail under it at the corners. I also made the sides removable so that once the concrete was partially set I could work the edge (like icing a cake). This time the pour was two-toned, with grey concrete on the bottom parts and colored concrete everywhere that was going to be visible. Everything went smoothly. In similar fashion, I poured the oven base and counter.
There was by now a 700 pound crate beside my growing structure. I unpacked it, checked all the pieces and got a feel for their heft. I established its position and laid the whole thing out for a dry run before setting it in place according to Mugnaini’s instructions. The trickiest part was making sure all the pieces could expand and contract. This meant reading and following exactly the specifications for the mortar bands that hold the ‘igloo’ together.
The upper walls went together quickly, and by this time I had friends and neighbors stopping by constantly to marvel at what had become a real presence on our back patio. The roof framing took some figuring, but was within my abilities as a woodworker. The lightweight concrete tiles looked as exactly right in a Northwest setting as they might in Tuscany.
The chimney assembly was a pain. I ended up ordering it from Mugnaini, because parts were unavailable in Seattle. The time it took turned out for the best, because the final angle for the collar (the flashing piece around the chimney) could only be determined with the finished roof in place.
And then, it was finished! Even before the stucco was on, I could temper the oven over a long weekend and invite friends over for pizza and champagne. Oh, what fun!
So, you might ask, would I do it again? You betcha!
Thanks for sharing your project. I have been thinking about building one of these myself for a long time. You have persuated me to start my project. The photos are great. I was curious if you had bigger photos of the project.
Thanks again for a great site….
someday I’ll have one of these. I bake a lot of bread but can’t stand how it heats my house up in the summer. On outdoor brick oven with a kitchen and pool…Its good to have dreams.
STUNNING!!!! My hubby built his from the ground up, even the igloo, brick by brick. I’ll have to show him your photos. He’d be thrilled! Have you baked bread in it yet?
I am so excited to find your blog!! My husband has dug the footer for the “patio” that will eventually hold our outdoor fireplace and pizza oven . . . and oyster roasting pit!! I can come here for tips!! He doesn’t have time for this project, but is looking forward to it because he loves concrete, mortar, cement . . . etc!! Glad to see you would do it again!
OMG I need to move down the street from you. Pop by for coffee when I smell this bad boy cooking something up. This is so amazing. I would give up anything in the world for a wood burning oven. So impressed!
sooo glad for your foodbuzz friend request, great minds think alike…..
Looks awesome !
Please add me to your newsletters and blog!
Hi, I’m so impressed with your “oven”,but I wonder how do you set the temperatur of that oven? Thanks, Etty Barus from Indonesia
Hey I didn’t know you were a homeboy (I’m in Philly).
Really enjoy your blog. I am another who built the oven on a whim and then built 1,000 sf of indoor/outdoor space around it. In fact, thing took over my life (great improvement, too).
Big difference, though – I built mine in about 3 weeks. As soon as it was ready to fire, I pushed the construction folks aside and had at it. For the next 12 months it only had the ceramic blanket and chicken wire on the outside – looked like a big pile of diapers. I did finally get around to putting stucco on it. But that’s about it. Now, I have a second, commercial size wfo. Maybe I’ll let the kids paint my home wfo to look like a turtle. They’re welcome, as long as I am not looking to bake. Might end up with half a turtle…
Hey, I am finding a oven and learn how to build it. Thanks you for sharing this helpful experience.